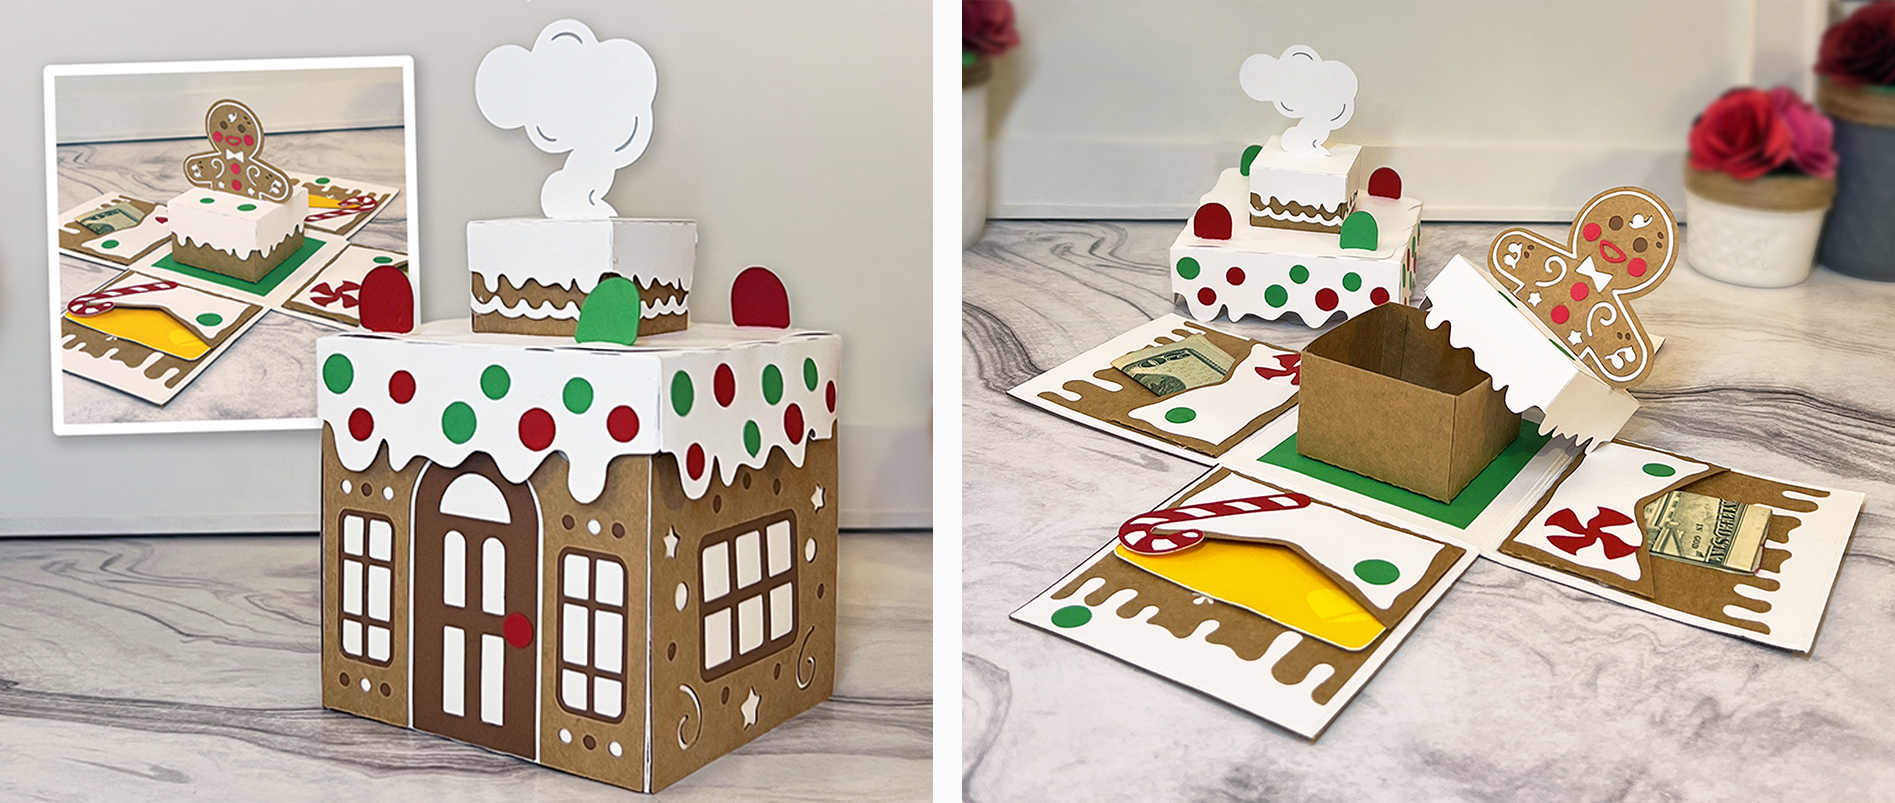
The holidays are the perfect time to add a little magic to your gift-giving, and this Gingerbread House Explosion Box is just the thing! On the outside, it looks like an adorable gingerbread house, complete with a chimney and “smoke.” But when the lid comes off, it bursts open to reveal hidden slots for gift cards or cash, plus a cute gingerbread man guarding a secret mini box for small goodies.
It’s a fun, surprising way to give something practical (like money or a gift card) while still making the moment memorable. Get the project here.
Want to see the full process in action? Check out my YouTube video tutorial where I walk through each step
Materials You’ll Need
- My custom SVG template (Get the project here)
- 67 lb cardstock paper:
- White
- Red
- Green
- Light Brown/Kraft Cardstock
- Dark Brown
- Gray
- Paper glue
Step 1: Build the Chimney

Locate the files named “Step-1_Chimney” and cut out each layer from your cardstock.
- Glue the white cloud of smoke onto the gray layer.
- Insert the smoke tabs into the white square layer and glue them into place.
- Glue that square layer down onto the white layer with the wavy edges.
- Fold along the score lines and glue each tab to form the chimney lid.
- Take the brown layer, fold along the score lines, and glue the tabs just like before.
- Add the wavy white trim all around the brown layer, which is the base of your chimney.
Step 2: Assemble the Lid
Locate the files named “Step-2_Lid” and cut out each layer from your cardstock.
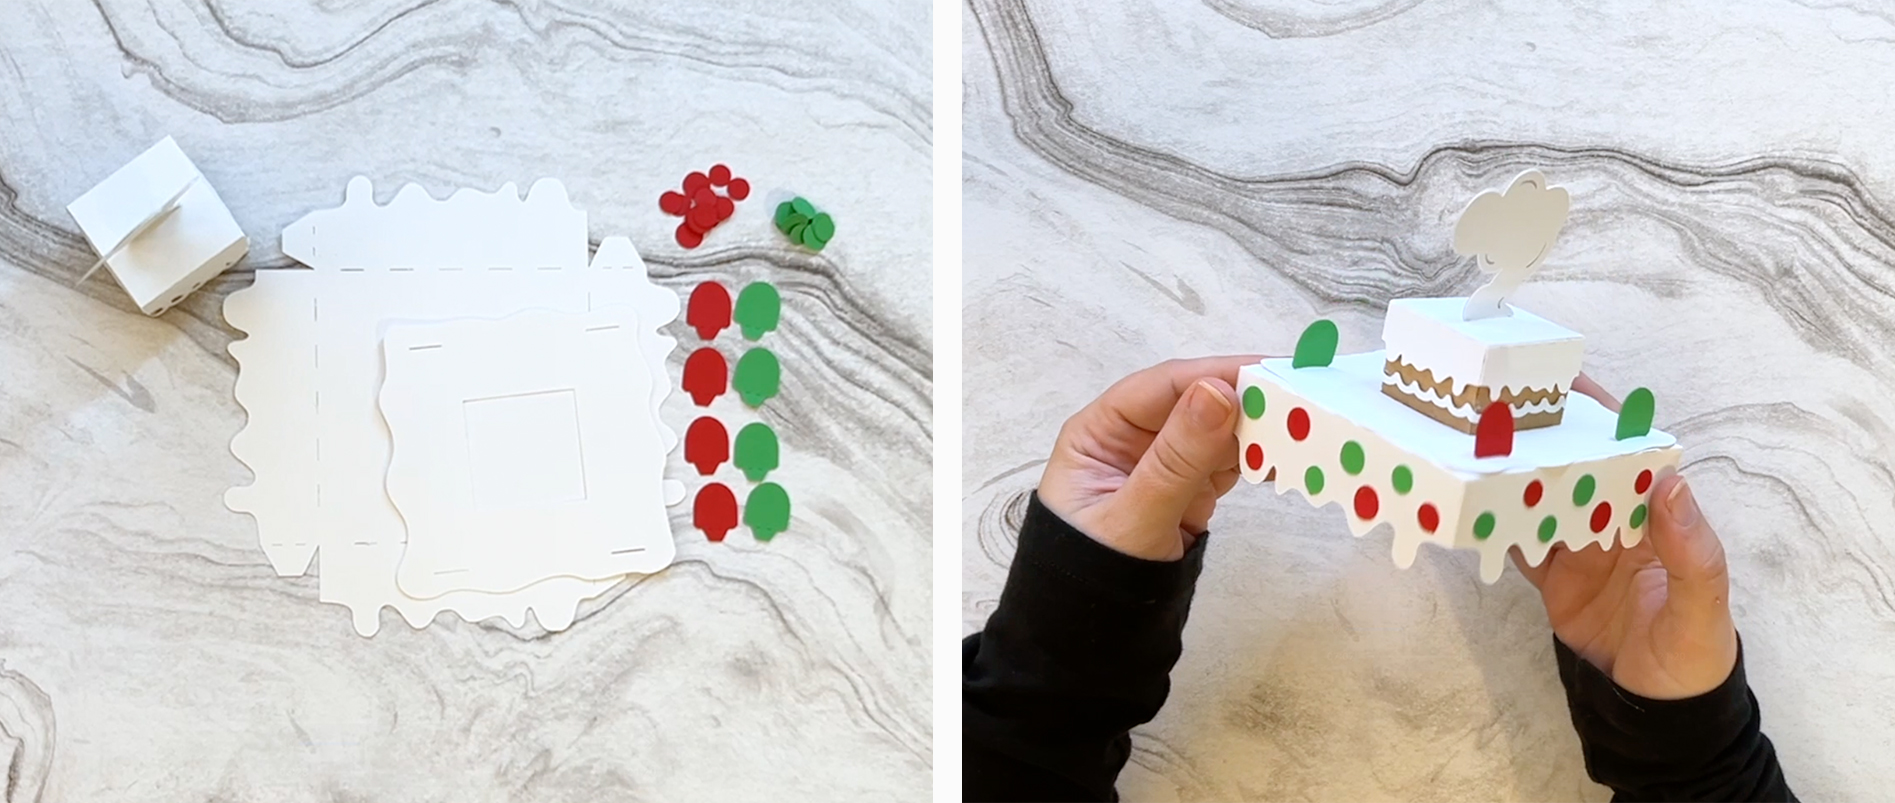
- Glue two green gumdrops together, leaving the tabs free. Repeat with the second set of green gumdrops and all four red ones.
- Take the white wavy square with the cutout and insert each gumdrop into a corner slit, folding the tabs down and gluing them into place.
- Glue that layer onto the larger white wavy square.
- Add glue to the square center and attach your chimney.
- Randomly add red and green dots around the edges for extra festive flair.
- Fold along the score lines, add glue to each tab, and form the lid.
Step 3: Create the Outer Walls

Locate the files named “Step-3_OuterWalls” and cut out each layer from your cardstock.
- Glue each lighter brown wall layer onto its darker brown backing.
- Add the red doorknob to the door.
- Grab the large white layer made up of 5 squares and glue each of the brown layers (And the door) onto the outer squares.
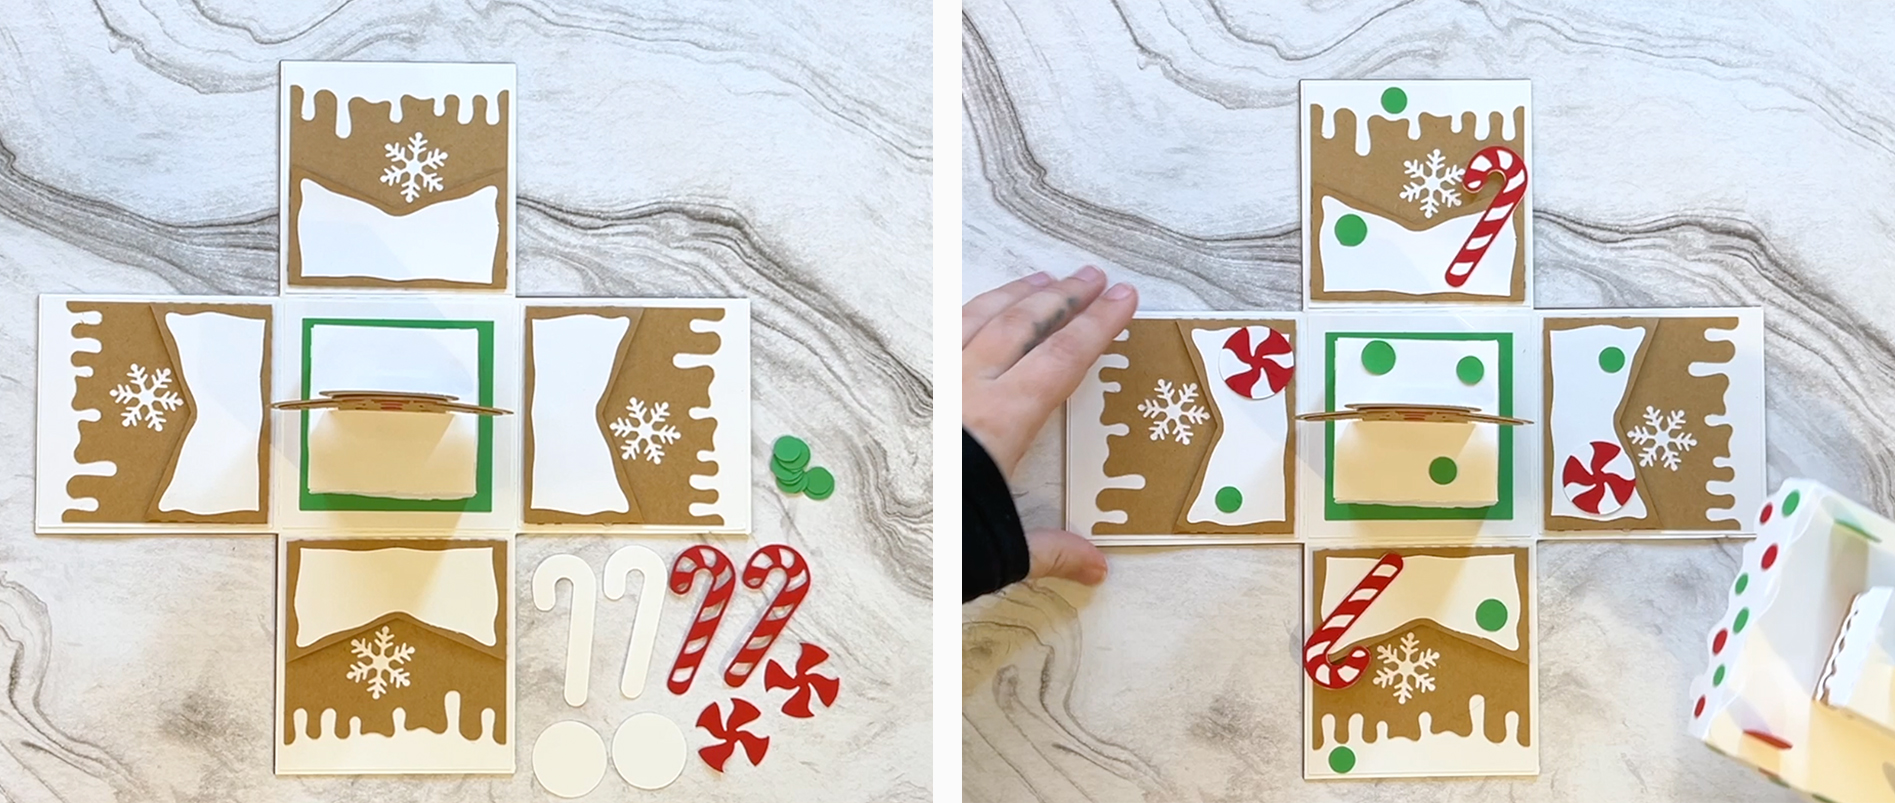
Step 4: Add the Inner Walls & Pockets

Locate the files named “Step-4_InnerWalls” and cut out each layer from your cardstock.
- Flip over that large white layer for the outer walls and glue a white square onto the back of each wall for extra sturdiness.
- Glue the green square to the center of the base.
- For each light brown pocket: fold along score lines, add glue to the tabs, and fold up into place.
- Add the small white wavy layers to the front of each pocket.
- Glue each pocket onto the outer squares of your large white layer.
Step 5: Make the Gingerbread Man & Small Box
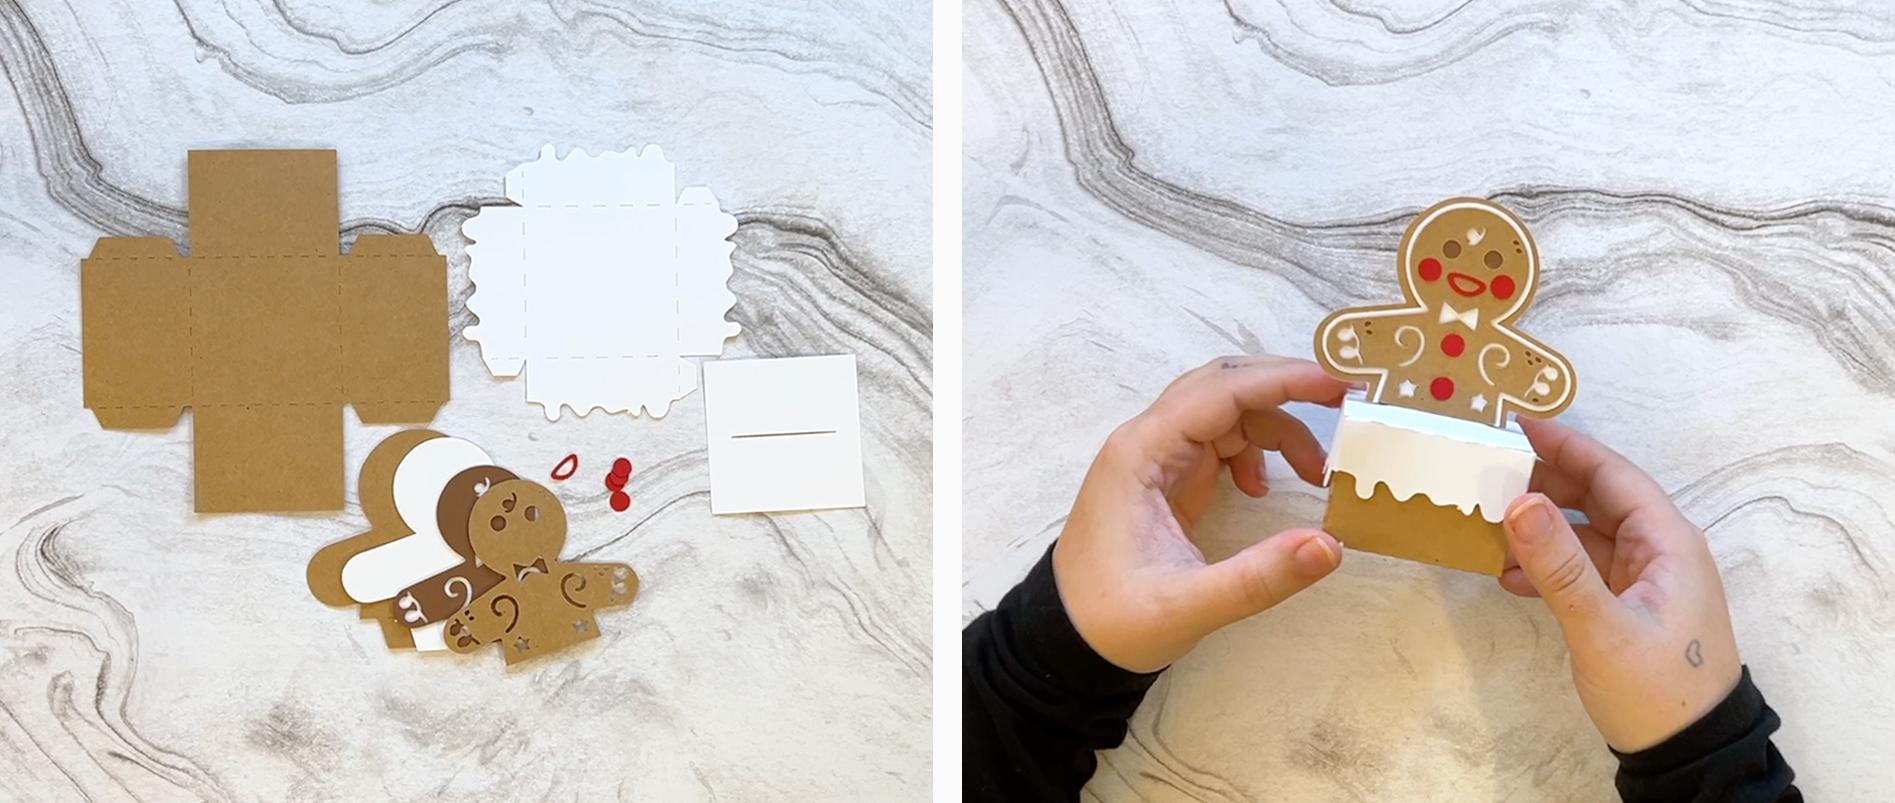
Locate the files named “Step-5_GingerbreadMan_SmallBox” and cut out each layer from your cardstock.
- Stack and glue the gingerbread man layers (from top down): light brown → dark brown → white → light brown (note: make sure you don’t glue the tab sections of the white and light brown).
- Add the gingerbread man’s mouth, cheeks, and buttons.
- Take your gingerbread man, and insert the tabs through the white square with the slit, then glue the tabs to secure in place.
- Attach that square to the wavy white base.
- Fold along the score lines, glue the tabs, and form the lid for the gingerbread man’s box.
- Take the light brown layer, fold along the score lines, glue the tabs, and form the base of the box.
Step 6: Finishing Touches
- Glue the gingerbread man box to the center of the green square.
- Put the lid on top.
- Grab the candy cane, peppermint, and green circle layers (found in the “Step-4_InnerWalls” file) and glue the red pieces onto the white backings.
- While those dry, randomly add glue dots around the inner walls and stick on your green candy circles for decoration.
- Glue the candy cane and peppermint pieces onto the inner walls.
- Fold up the walls, tuck everything inside, and place the lid back on.
And that’s it! Your Gingerbread House Explosion Box is all ready to spread holiday cheer. This festive DIY gift box is sure to wow your friends and family—and the best part is that it’s handmade by you. Whether you tuck in a gift card, some cash, or tiny treats, the surprise factor makes it extra special and unforgettable.
If you liked this holiday explosion box tutorial, be sure to check out my other SVG templates and 3D paper craft projects for more creative, fun, and memorable ways to give gifts. View the shop
I’d love to hear what you think and how your creation turns out, so be sure to share your results. Thanks so much for crafting with me!
💜 Becca