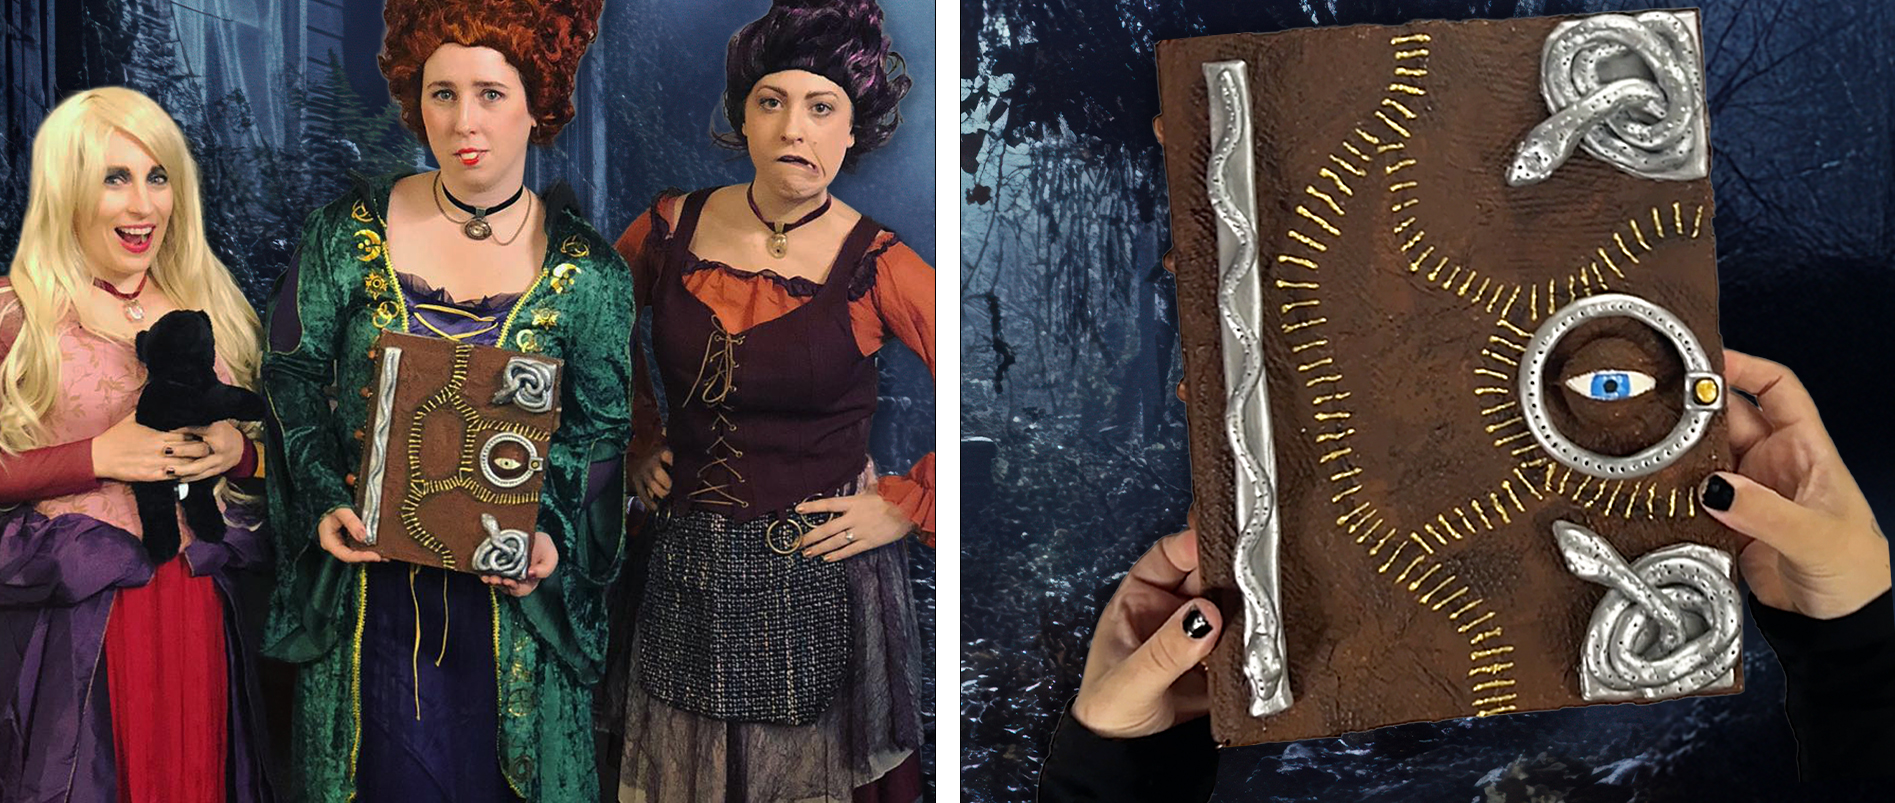
If you’re looking for a fun Halloween craft, you’re in the right place. Today we’re making the Manual of Witchcraft and Alchemy, better known as the Hocus Pocus spell book. This DIY project works perfectly as a costume prop, a spooky piece of home décor, or even a clever spot to hide candy on Halloween night.
Want to see the full process in action? Check out my YouTube video tutorial where I walk through each step of making the Hocus Pocus spell book.
In the movie, the Sanderson sisters’ book is said to be bound in skin, written in blood, and filled with dark spells. Our version is much less gruesome but still has that eerie, haunted look that makes it so memorable. I first made a spell book for a group costume a few years ago, and since then I’ve refined the process. Now I’m excited to share how you can make one of your own.
With a few simple supplies and some creativity, you’ll have a creepy book that feels like it stepped right out of the Sanderson sisters’ lair.
Materials You’ll Need
- An old book (any size, mine is about 9” x 11”)
- Utility blade or X-Acto knife
- Paper glue + clamps
- Ruler
- Matte Mod Podge
- Paper towels
- Paint brushes
- Acrylic paint (browns, blacks, silver, gold, and eye colors)
- Air-dry clay or Model Magic
- Toothpick
- 3D fabric paint
- Ribbon
💡 Tip: This project requires a lot of drying time. Make sure each layer is fully dry before moving on to the next step for the best results.
Step 1: Create a Secret Compartment (Optional)
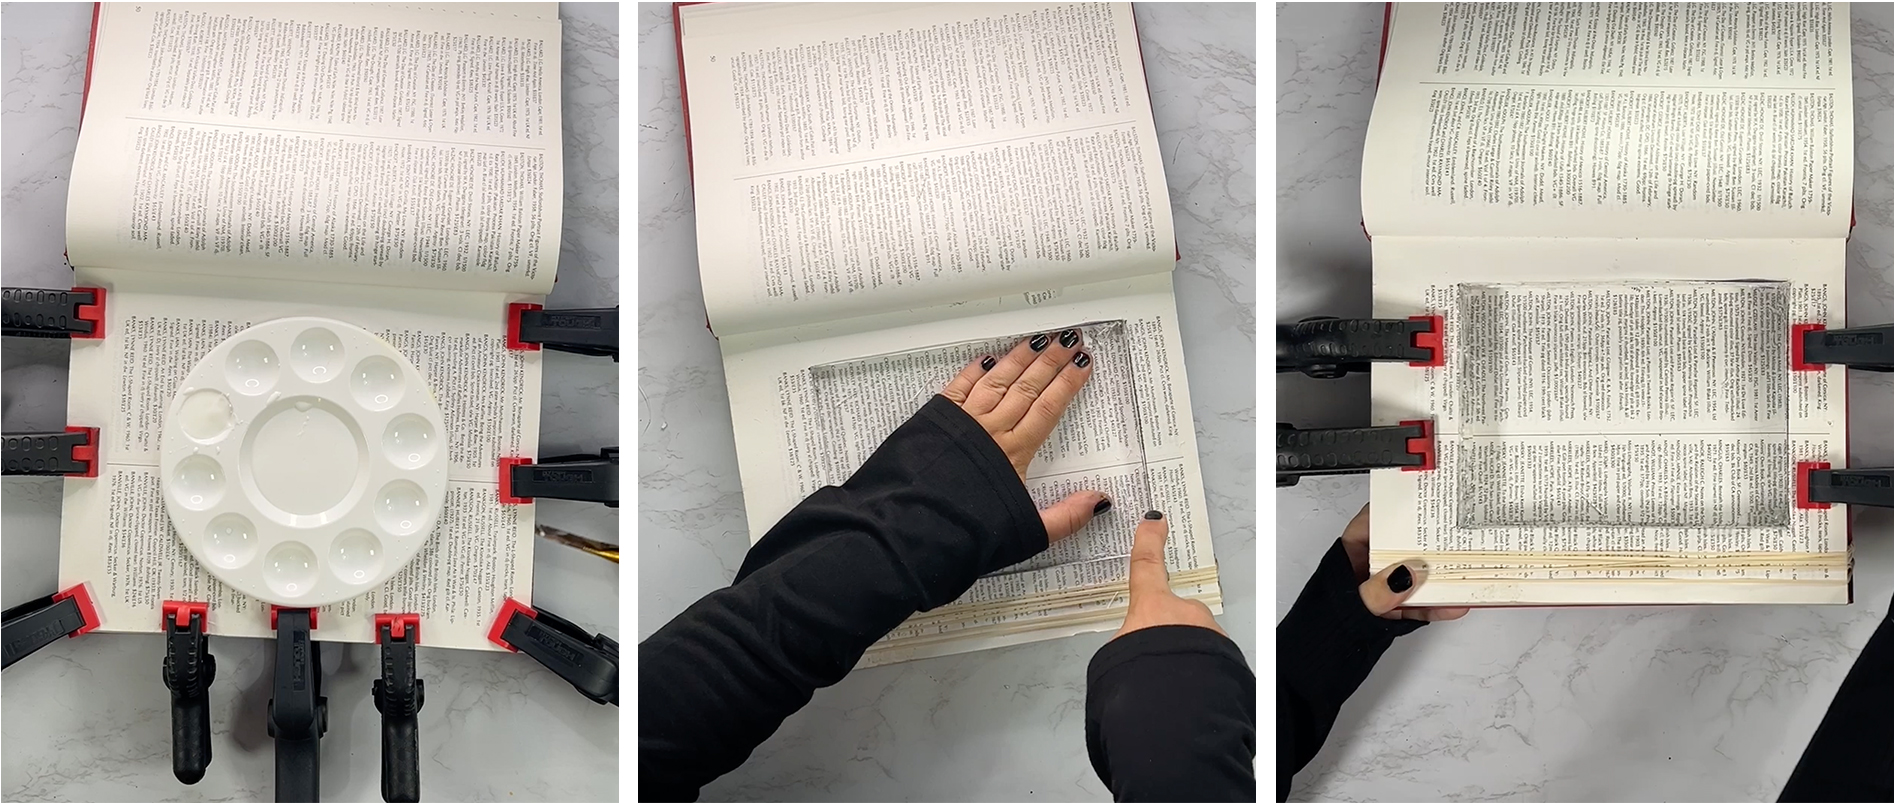
This step is totally optional, but I love adding it in because it has a couple of perks. It makes the book much lighter to carry if you’re using it as a prop, and it also creates a secret compartment you can use to stash candy or little Halloween surprises. It’s a small detail, but it adds a fun extra layer of magic to the finished project.
Start by gluing the outer edges of your book’s pages together. I like to leave about 50 pages free at the front, then clamp the rest until dry (overnight works best).
Once dry, cut out the center with your utility blade, a few pages at a time, until the compartment is as deep as you’d like. Add glue to the inner edges, clamp again, and let it fully dry.
Step 2: Add the Cover Texture
Start by flipping your book so the covers are facing up. Using the pictures above as a guide, sketch wavy lines across the back and front covers. These will mark out the different sections for the skin texture.

With your Mod Podge, paper towels, and a paint brush in hand, begin brushing Mod Podge onto one section. Press torn strips of paper towel into the glue, letting some pieces overlap or bunch up to create an aged, worn look. Once each piece is in place, brush more Mod Podge over the top to seal it. Keep going until both covers are fully textured.
Next, prepare the spine. Cut a strip of paper towel to the same size as the spine, then cut out five rounded sections. These will form the base for the finger details that get added later.
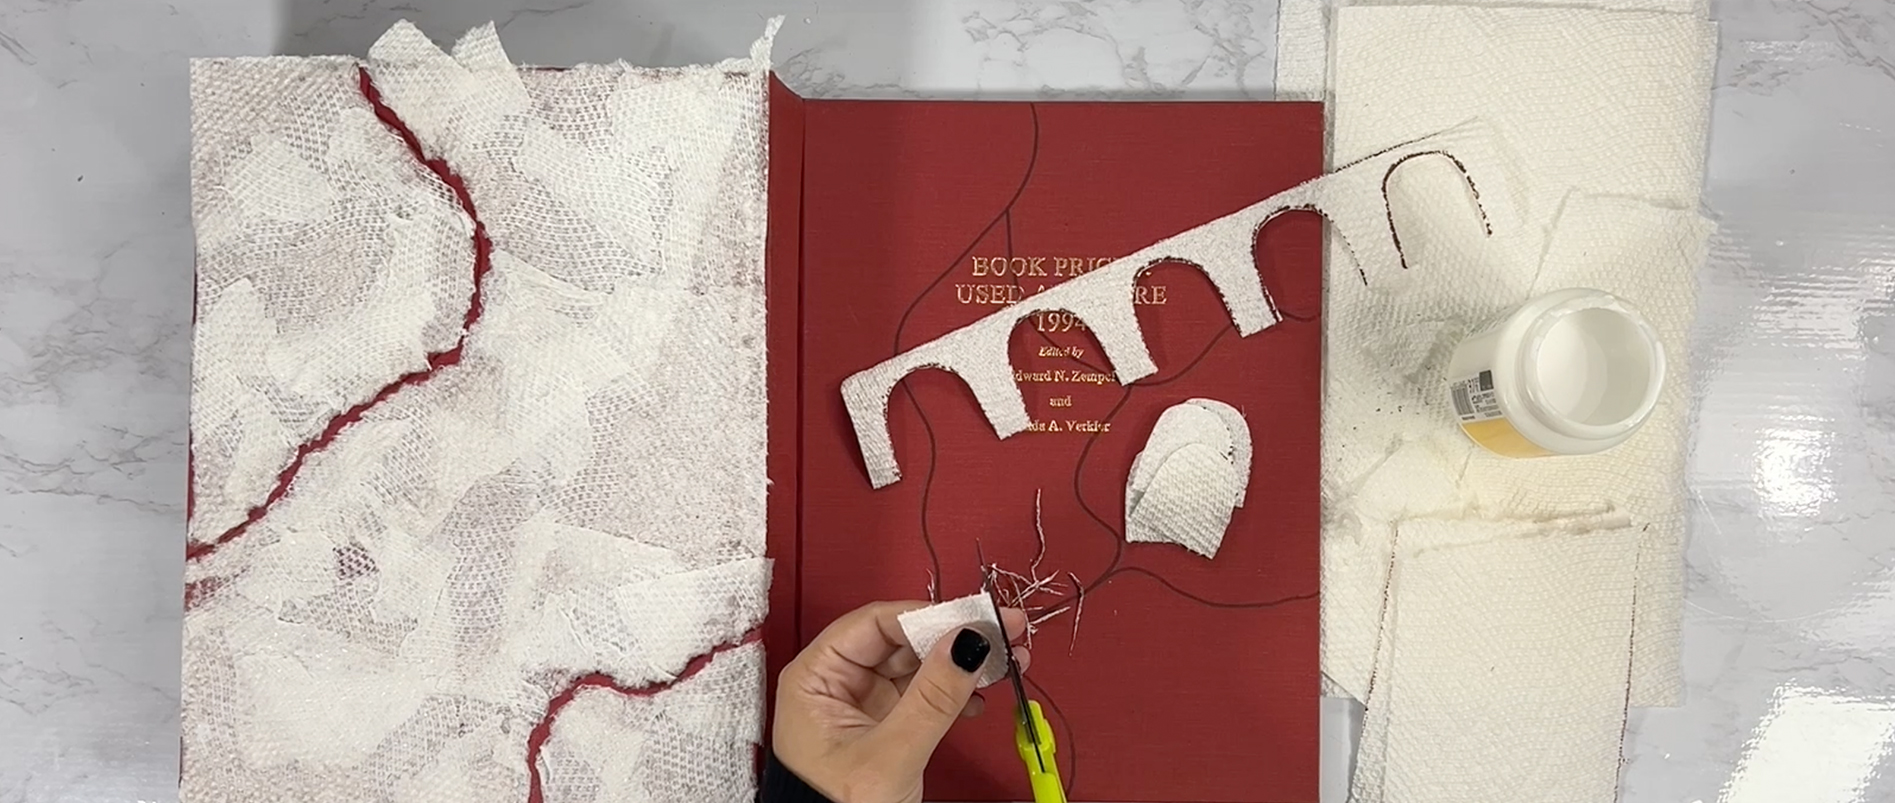
When everything is covered, set the book aside to dry completely (overnight is best). After it’s dry, trim off any loose edges with scissors so the book is neat and ready for the next step.
Step 3: Sculpt the 3D Elements
Using Model Magic* or another type of air-dry clay, sculpt the spell book’s main details:

- Eyeball: Roll a ball about the size of a ping pong ball and cut it in half horizontally.
- Corner Snakes: Flatten two pieces of clay and cut them into rounded rectangles for the base. Roll out two thin, rounded shapes for the snake bodies, pinch the ends into elongated heads, and add small clay eyes. Coil each body on top of its base, then use a toothpick to poke holes along the snakes for texture.
- Long Snake: Roll out a thin, rounded shape for the body that is about one inch shorter than the length of your book. Flatten another piece of clay into a rectangle slightly larger than the snake, then place the snake on top in a wavy line. Use a toothpick to poke holes down the length of the body.
- Fingers: Measure your book’s spine, then shape five small finger-like pieces to fit. Use a utility knife to carve knuckle lines and outline a nail on each one.
- Eye Clasp: Roll out clay and form it into a circle large enough to fit neatly around the eyeball. Cover the seam with a small clay square, then stack a flattened circle on top of the square and another smaller circle on top of that. Use a toothpick to evenly poke holes around the clasp for detail.
Set all of your clay pieces aside and allow them to air dry completely.
*I like using Model Magic because it’s lightweight and won’t make the finished Hocus Pocus spell bbook feel too heavy.
Step 4: Paint the Clay

- Eyeball: Choose any color you like. I used three shades of blue with black for the pupil and a touch of white for reflection details.
- Corner Snakes: Start by brushing black paint into all of the toothpick holes. Once dry, paint over the entire piece with metallic silver.
- Long Snake: Just like the corner snakes, brush black paint into the holes first, then cover the whole piece with metallic silver.
- Fingers: Paint the fingers the same brown you used on the book. They should look a little messy and dirty, so don’t worry about keeping them too neat.
- Eye Clasp: Brush black paint into the toothpick holes, then paint the whole circle piece with metallic silver. Paint the bottom circle black and the top circle metallic gold. For extra dimension, you can also add on a bit of glitter paint.
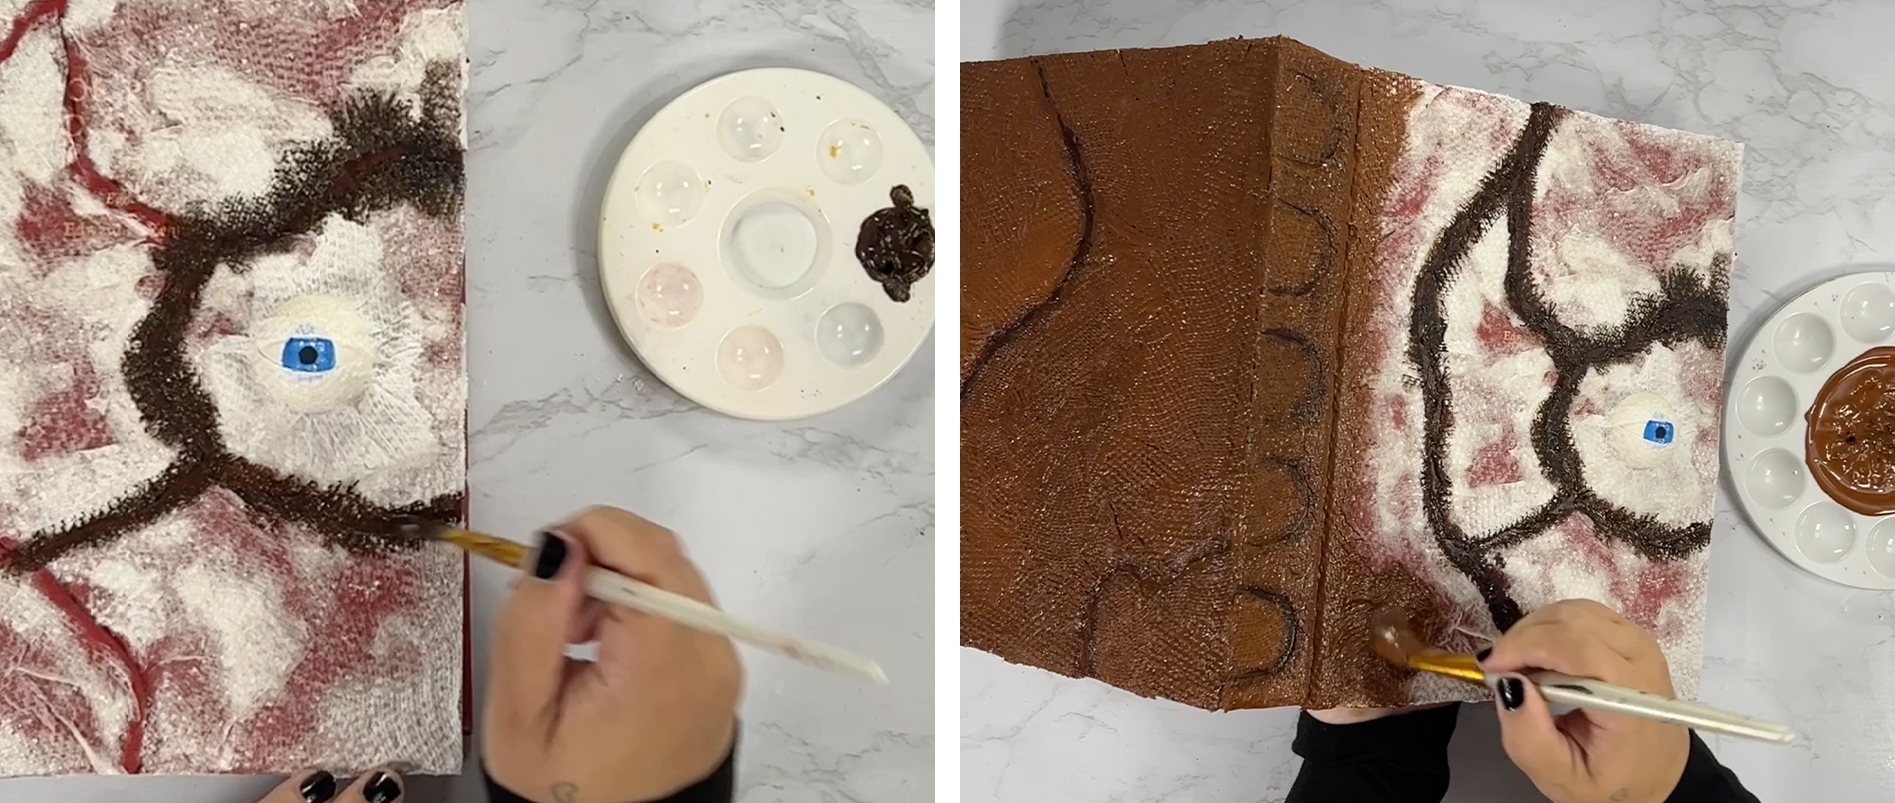
Step 5: Add Eyelids
Once the eyeball is dry, glue it into place on the front cover. Use paper towels and Mod Podge to drape eyelids over the top and bottom.

Step 6: Paint the Book
Begin by painting all the seams with a dark brown. Fill the remaining sections with a slightly lighter shade, then go back in with a few random darker strokes. This layering helps give the cover an old, weathered look.
Step 7: Stitch the Seams
Using 3D fabric paint is a total game changer for this step. The raised effect adds extra texture and helps bring the Hocus Pocus spell book to life. The squeeze bottles also make it easy to control how much paint comes out, which makes applying all those stitches quicker and less messy.

Go over every seam you created earlier, adding stitches that are spaced out fairly evenly. Once you’re done, set the book aside and let the paint dry completely before moving on.
Step 8: Assemble the Pieces

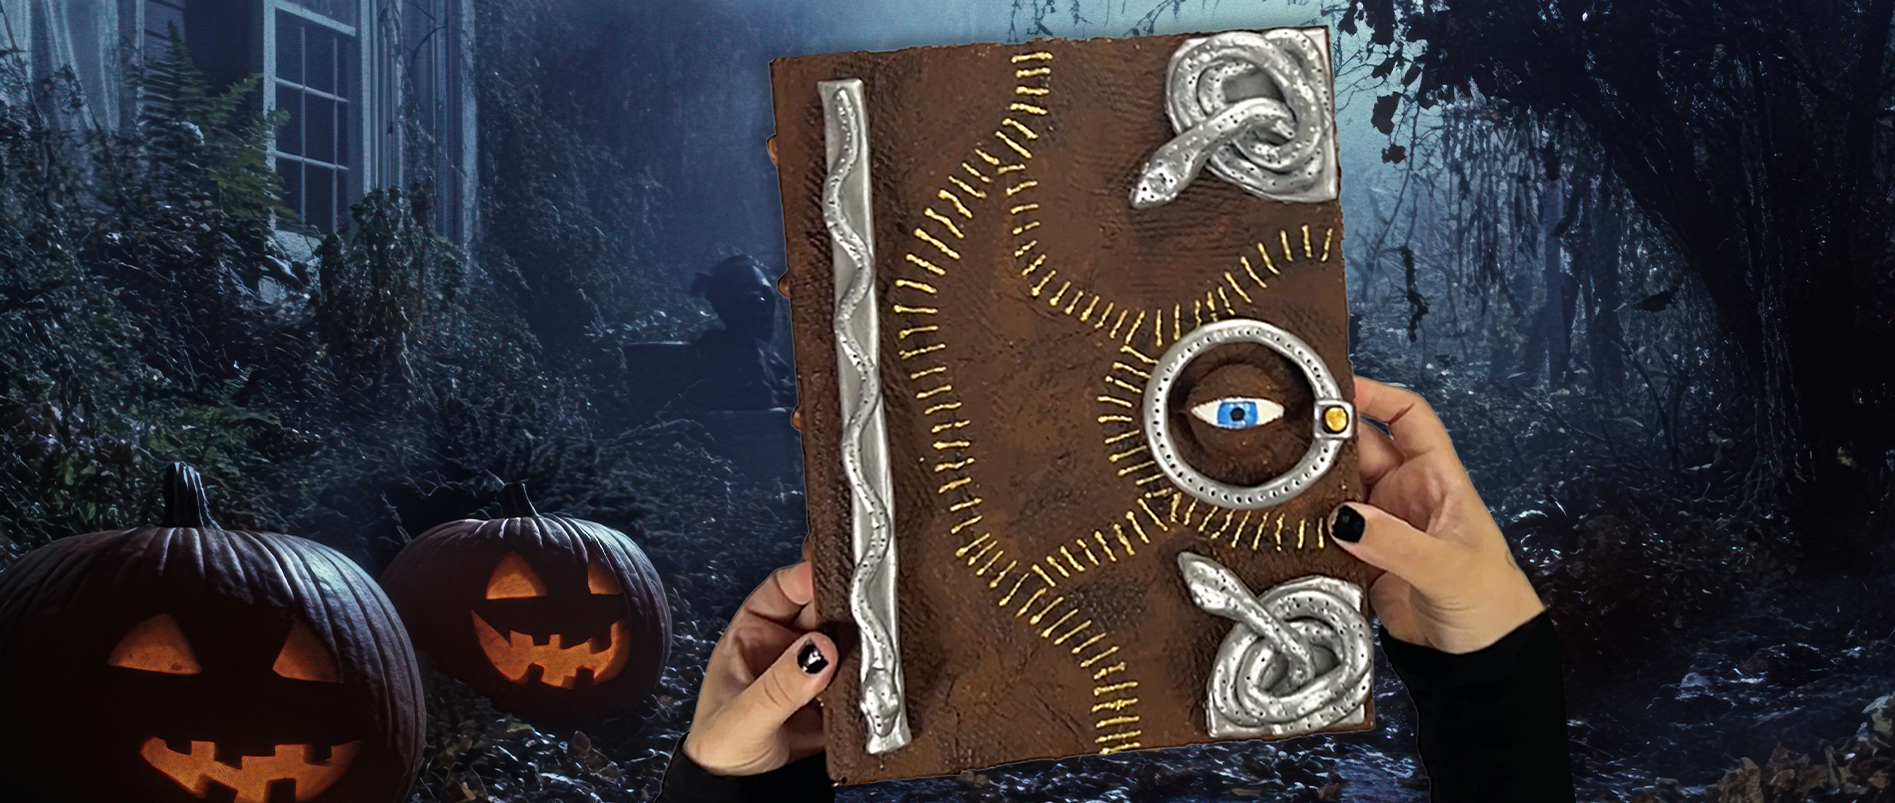
Once the book and clay pieces are fully dry, it’s time to bring everything together. Here’s where each detail goes:
- Corner Snakes: Attach one to the top right corner and the other to the bottom right corner.
- Long Snake: Position this along the left side of the front cover.
- Fingers: Line the fingers down the spine, placing each one in the center of its section.
- Eye Clasp: Secure this around the eyeball to finish off the focal point.
Step 9: Add a Ribbon Bookmark (Optional)
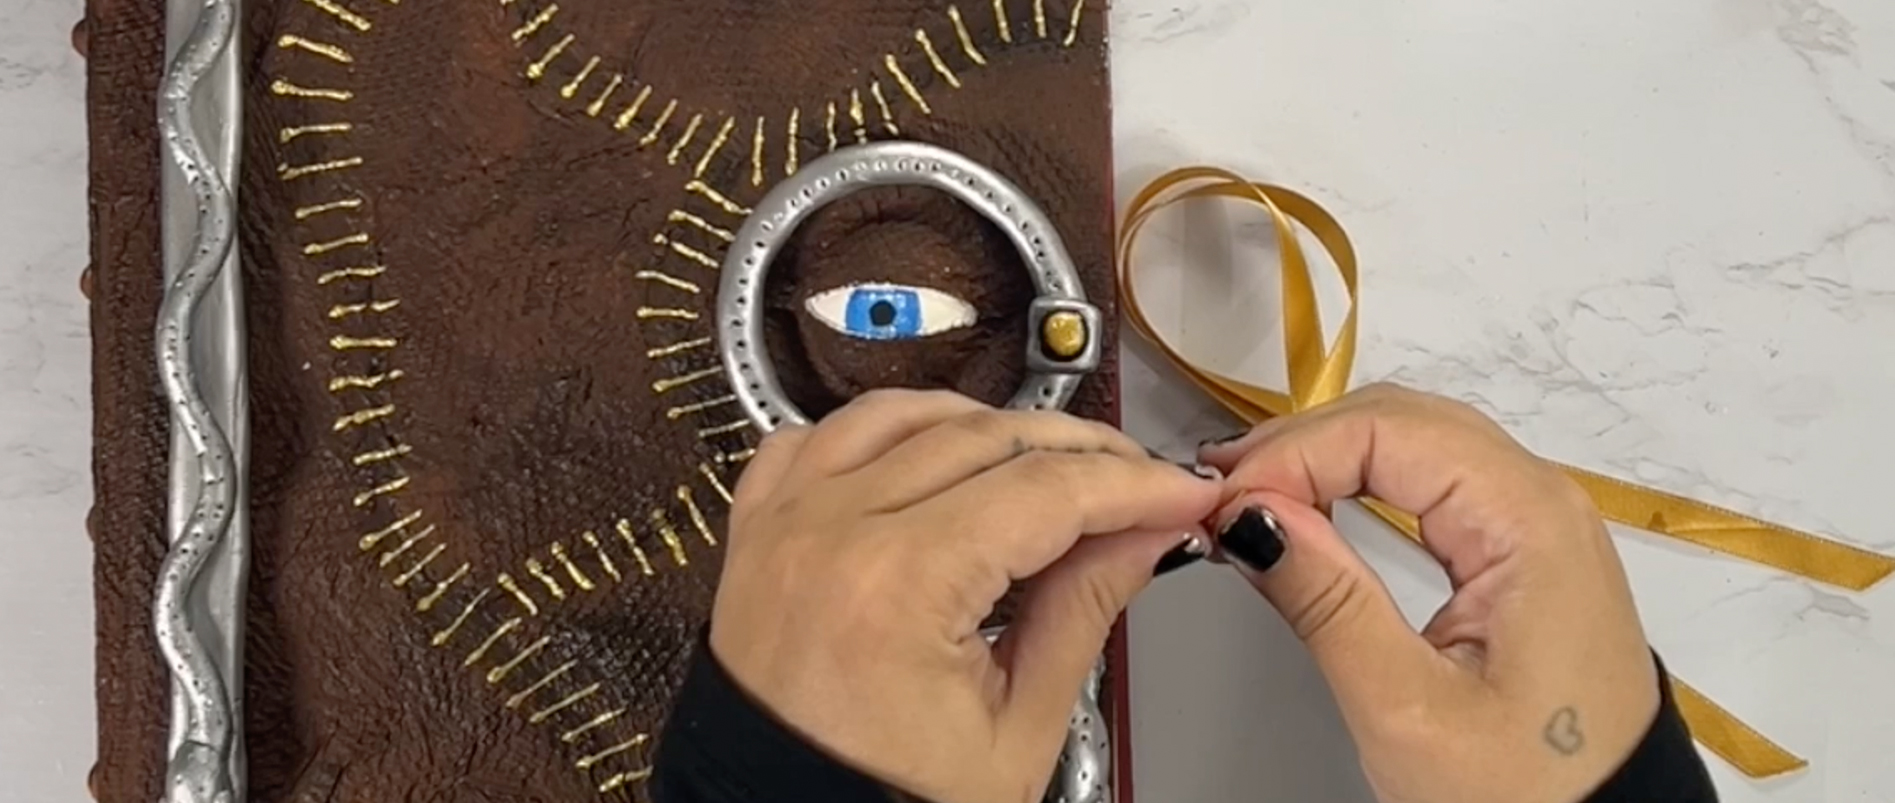
For a finishing touch, you can add a ribbon bookmark. I used a gold ribbon, cut two pieces to the same length, glued the ends together, and then attached it to the top inside edge of the spine. This adds a little extra detail and gives your Hocus Pocus spell book a polished, finished look.
And there you have it! With your spell book complete, you’re ready to conjure a little dark magic while wowing everyone around you. Whether you’re raising the dead, turning unsuspecting victims into cats, or plotting your next mischievous scheme, your Hocus Pocus spell book is ready to do its work.
I’d love to hear what you think and how your creation turns out, so be sure to share your results. Thanks so much for crafting with me!
💜 Becca