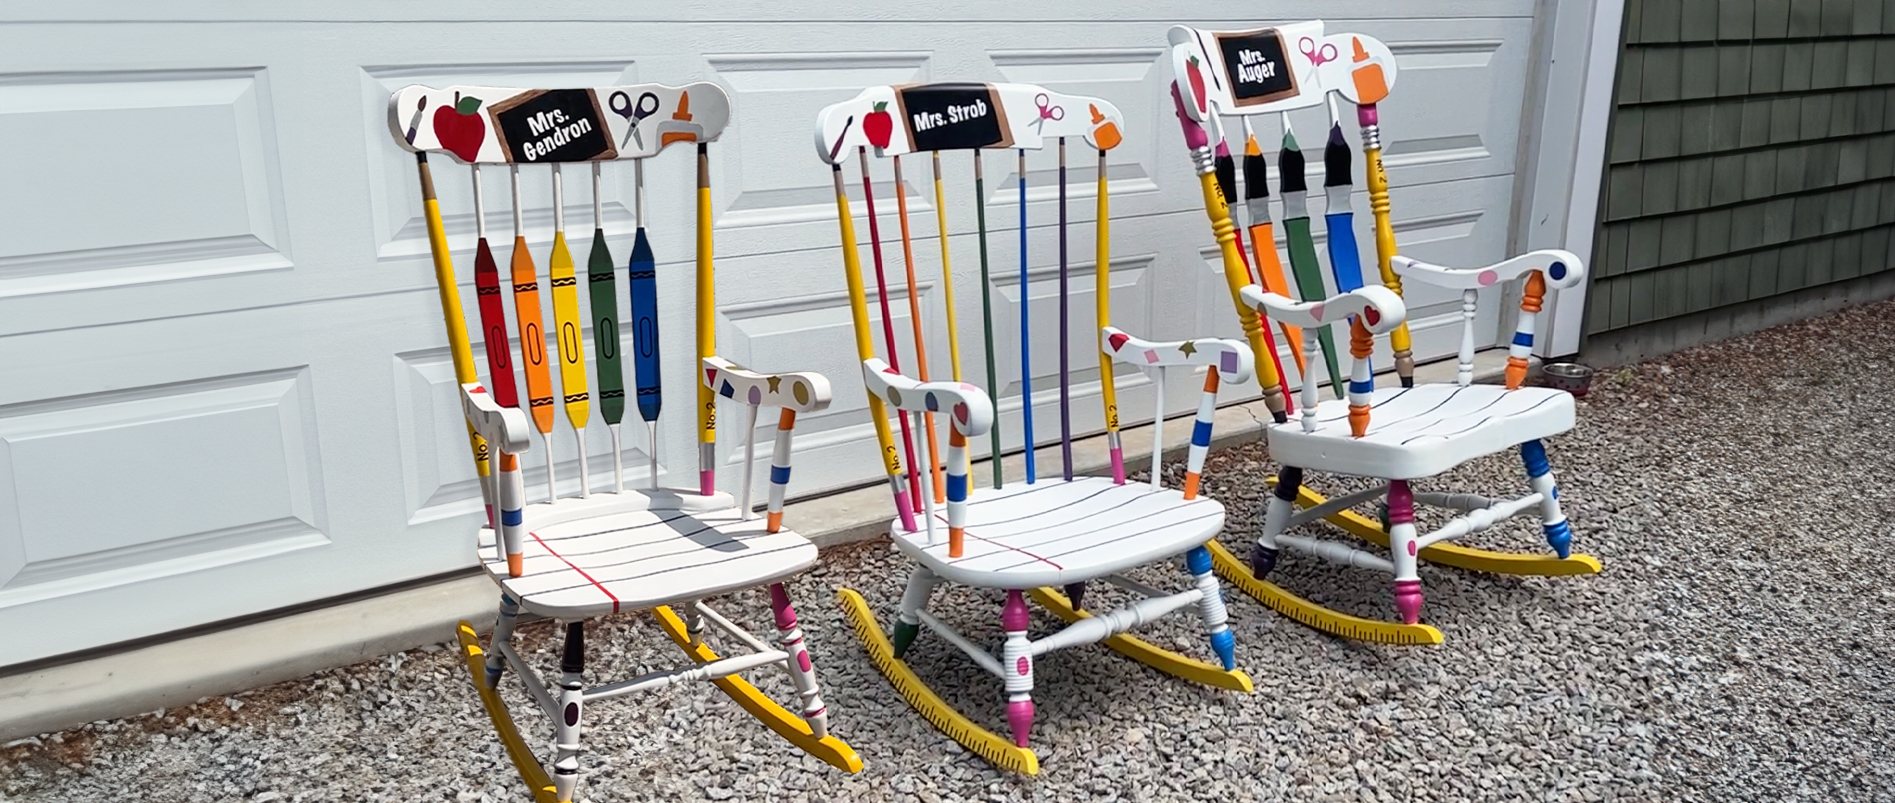
There’s something extra special about giving a gift that’s made by hand, and when it comes to celebrating teachers, nothing beats a personalized teacher rocking chair painted just for their classroom. Whether it’s a bright spot for story time, a comfy seat during lessons, or just a fun piece of classroom decor, these chairs always bring smiles. I’ve painted quite a few of them over the years and finally recorded my full process so you can try it too!
In this post, I’ll walk you through every step of how I paint my teacher-themed rocking chairs—from prepping and painting to adding fun school supply details with vinyl and stencils. I’m also including a free download of the files I use, so you can create your own version!
Supplies You’ll Need
Here’s a quick rundown of what I use to complete each chair:
- A wooden rocking chair (any size or shape!)
- Sandpaper or sanding block
- White Spray Paint + Primer in One
- Outdoor acrylic paints in various colors
- Painter’s tape
- Paintbrushes in various sizes
- Clear sealer spray
- Project Files → Download Now
- Optional: white pillowcase, iron-on transfer for lined paper design, stuffing for cushion
Step 1: Prep and Prime the Rocking Chair

Start by giving your teacher rocking chair a once-over. If it’s rough or shiny, give it a quick sand to help the paint adhere better. A medium-grit sanding sponge or sandpaper will work just fine. Make sure to wipe down any dust before painting.
For the base coat, I like to use Rustoleum Paint + Primer in One, usually in white. White gives a bright, clean base for all the fun colors we’ll be layering on top. I typically do two coats, letting it dry fully between layers. If you can’t find a paint + primer combo in a color you love, you can always do a separate primer coat first.
Step 2: Colorful School Supply Details

This is where the real fun begins—turning different parts of the chair into crayons, pencils, glue sticks, markers, and more! The exact details might vary depending on the shape of your chair, and that’s part of the charm. Each one is unique.
Spindles (Back of the Chair)
Start by looking at the back spindles. These are perfect for school supplies! I let the chair “tell me” what to paint based on the shapes:
- Thicker spindles → great as paintbrushes
- Medium spindles → ideal crayon shape
- Slimmer spindles → perfect for colored pencils
- I almost always keep the outer two as No. 2 pencils
For the No. 2 pencils:
- Paint the entire spindle yellow
- Add tan at the top
- Use black for the pencil tip
- Add light pink at the bottom with a stripe of metallic silver for the eraser
Let each color dry before adding the next layer so they stay crisp.
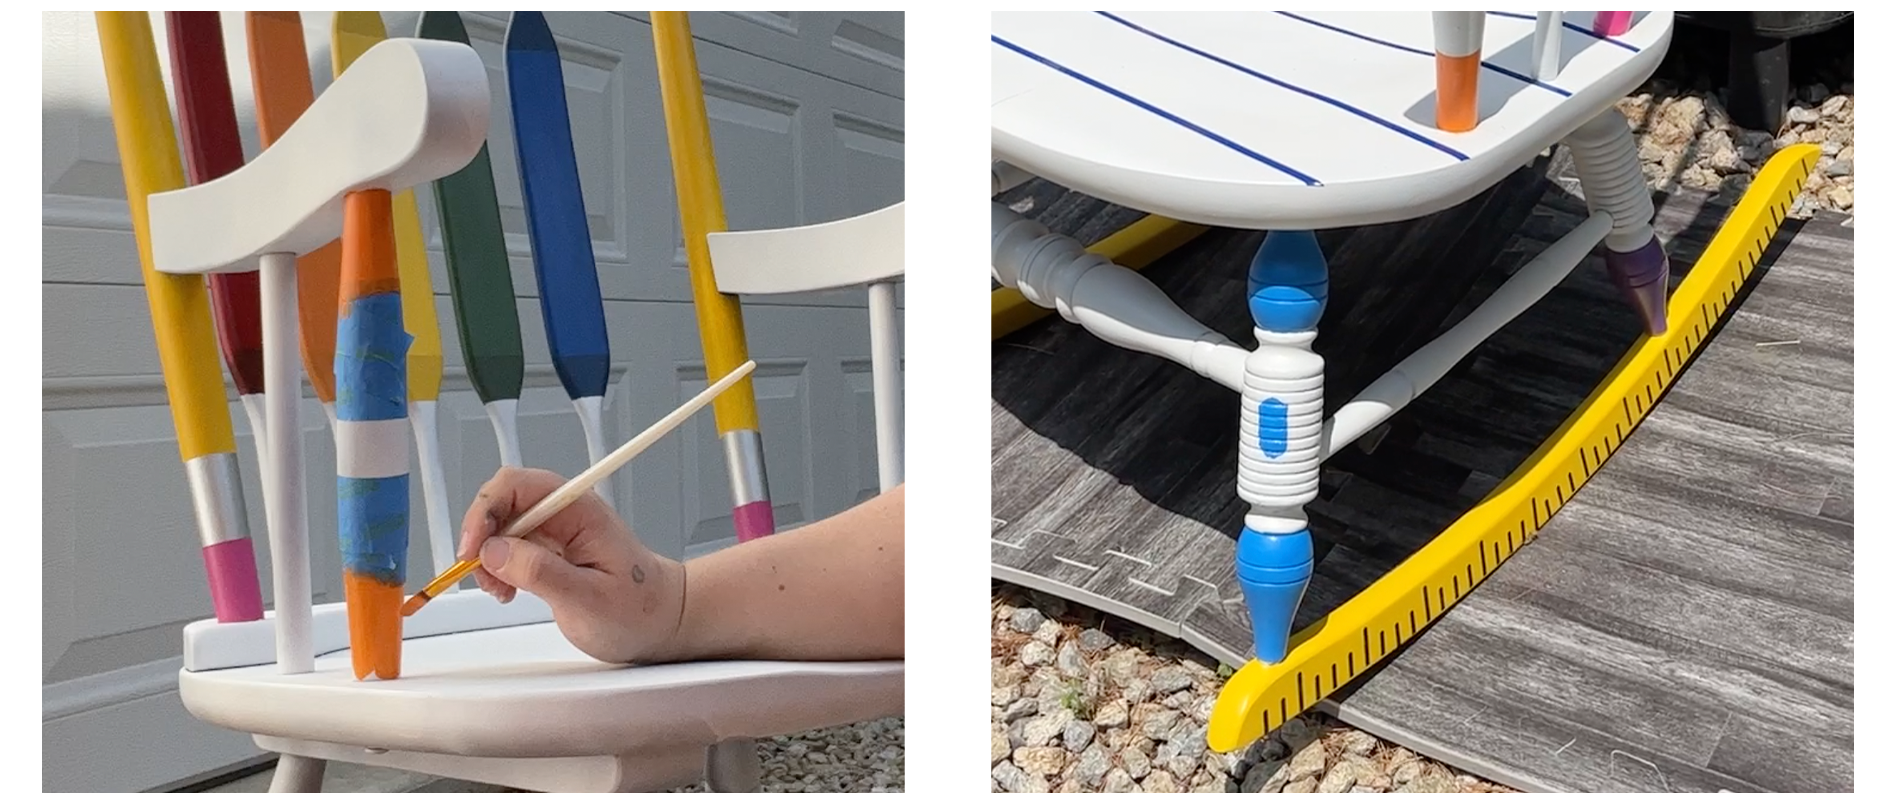
Arm Supports (Front Spindles)
The front vertical spindles that hold up the arms are perfect for glue sticks. I paint orange on the top and bottom and a bold blue stripe in the middle.
Bottom Rockers
The curved part at the bottom of the rocking chair—the part that actually rocks—makes a great spot for rulers! Paint them bright yellow and add ruler hash marks if you like. You can use vinyl or hand-paint these.
Chair Legs
The legs or front supports on the chair are great places for markers. I paint a color block at the top and bottom of the leg and then add a small oval in the center to represent the marker label. Flipping the chair over helps with this step!
Step 3: Stenciling the Top of the Rocking Chair

Once the base details are dry, I move on to the top section of the teacher rocking chair. This is where I really like to add personality—you can include a chalkboard, fun school supplies, or anything that reminds you of the teacher.
I use stencils to help with placement and basic shapes. The stencil files I’ve included have full shapes for items like:
- Scissors
- Glue bottle
- Apple
- Paint brush
- Chalkboard
How I Do It:
- Cut the stencil and lay it where you want the design to go
- Trim the stencil so it fits neatly on the slat
- Paint inside the stencil to block out the shape
- Once dry, remove stencil and add more details by hand
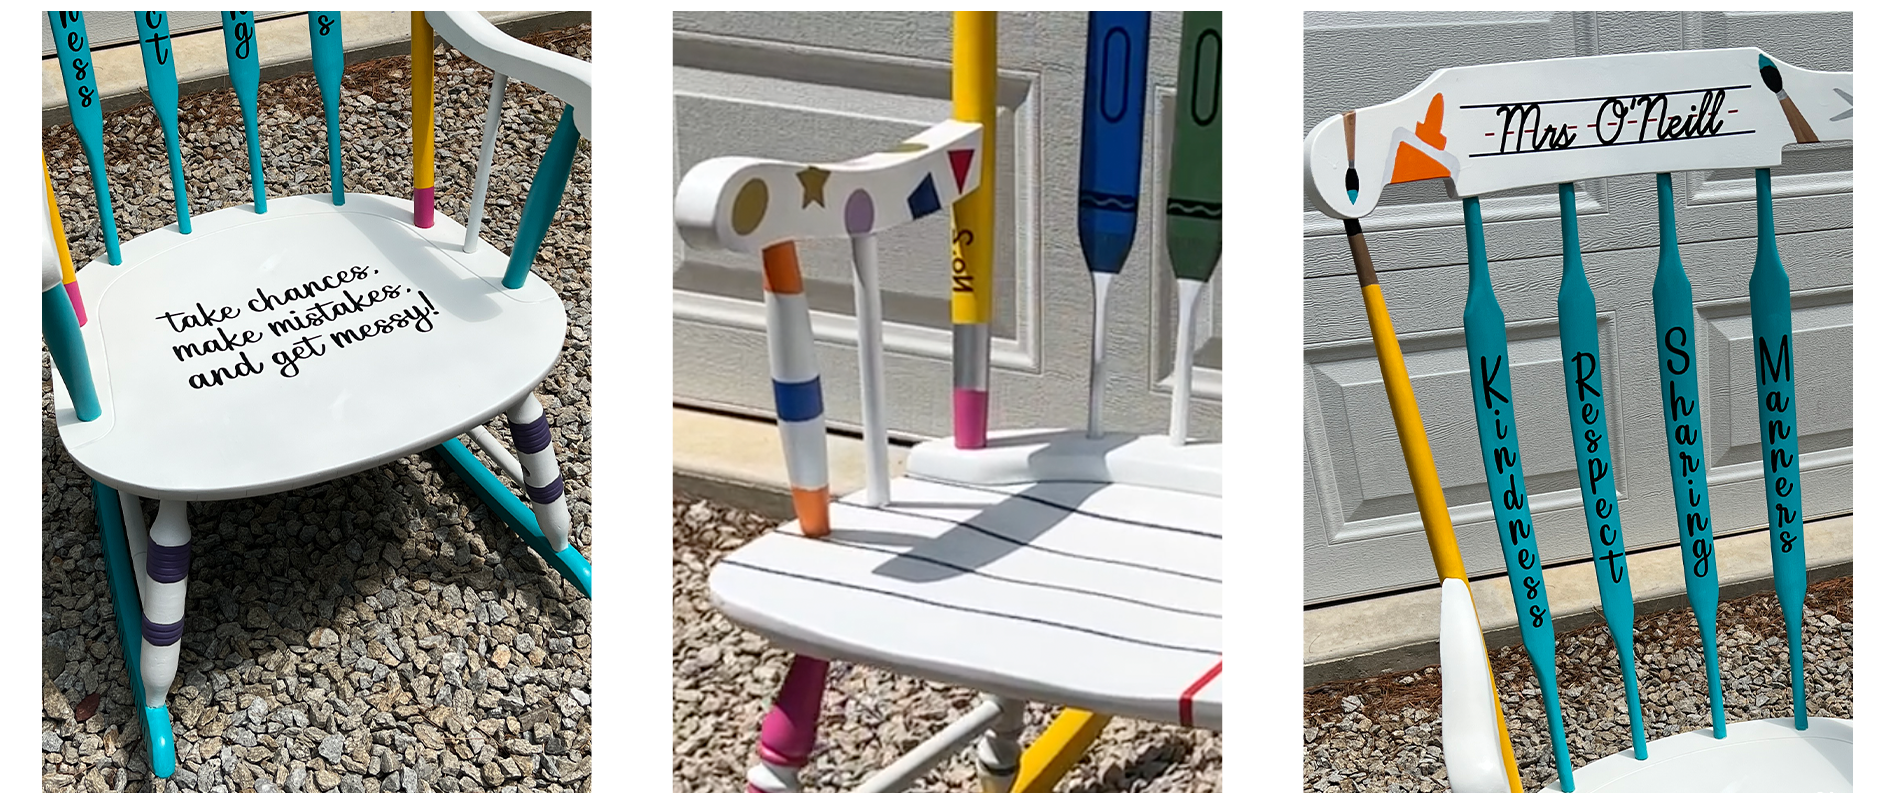
I always add a chalkboard in the middle. I angle it slightly and paint a simple black rectangle with a brown frame. It gives that classic classroom vibe. The rest is all about customizing! You could add the teacher’s name, a fun quote, or words of encouragement. This section is perfect for tailoring to the teacher’s personality or grade level.
Step 4: Adding Vinyl Details

By now, the paint should be dry enough to go back and add vinyl for extra pop. I use my cutting machine to create vinyl pieces that add details like:
- Crayon wrappers
- No. 2 labels on pencils
- Ruler lines
- Alphabet or numbers around the seat (if applicable, not all chairs have the space for this)
Earlier in my chair projects, I used vinyl to create a lined paper effect right on the seat. But I’ve since started using white pillowcases and ironing on a lined paper design instead. Once I stuff the pillowcase, it becomes a cozy cushion that’s also super cute and thematic.

Step 5: Seal and Protect Your Rocking Chair
When everything is dry and in place, I give the whole teacher rocking chair a light spray with an outdoor-safe clear sealer. This helps protect the paint from chipping or fading over time, especially if the chair is used regularly in a busy classroom.
Optional Extras
There’s always room for a little extra flair, depending on how much space you have on the chair. Some fun ideas to consider:
- Add ABC or 123 around the outer edge of the seat
- Include stars or hearts on the arms
- Use metallics or glitter paints for a little sparkle
- Add a fun quote to the seat
- Switch up the chalkboard for lined paper
The trick is to keep things balanced—you want it full of life, but not so busy that it feels crowded. If a section looks too full, it’s okay to leave a little white space.
Download the Free Files
To help you get started, I’m sharing the exact stencil files and vinyl shapes I use on my teacher rocking chairs. These files were created to work with cutting machines like Cricut or Silhouette.
Note: Be sure to measure your chair and adjust the files as needed. Since every chair is different, you’ll need to resize the graphics to ensure they fit your space just right.
Final Thoughts
I absolutely love making these chairs—every one feels different, and it’s such a joy knowing they’ll live in a classroom full of young learners. Whether you’re making one as a gift for a favorite teacher, a retirement present, or just a special seat for your own classroom, I hope this guide helps you bring your idea to life. Let me know what you think in the comments!
If you enjoyed this project, be sure to check out some of the crafts and templates I share over on my Etsy shop – Novae Makers Mart. I’ve got a growing collection of DIY ideas and hope to post more fun paint and decor projects like this soon!
Thanks for crafting with me,
💜 Becca